
In an effort to improve the Transmittal Letter functionality and ease of use, this feature has been redesigned.
T-Letter Settings
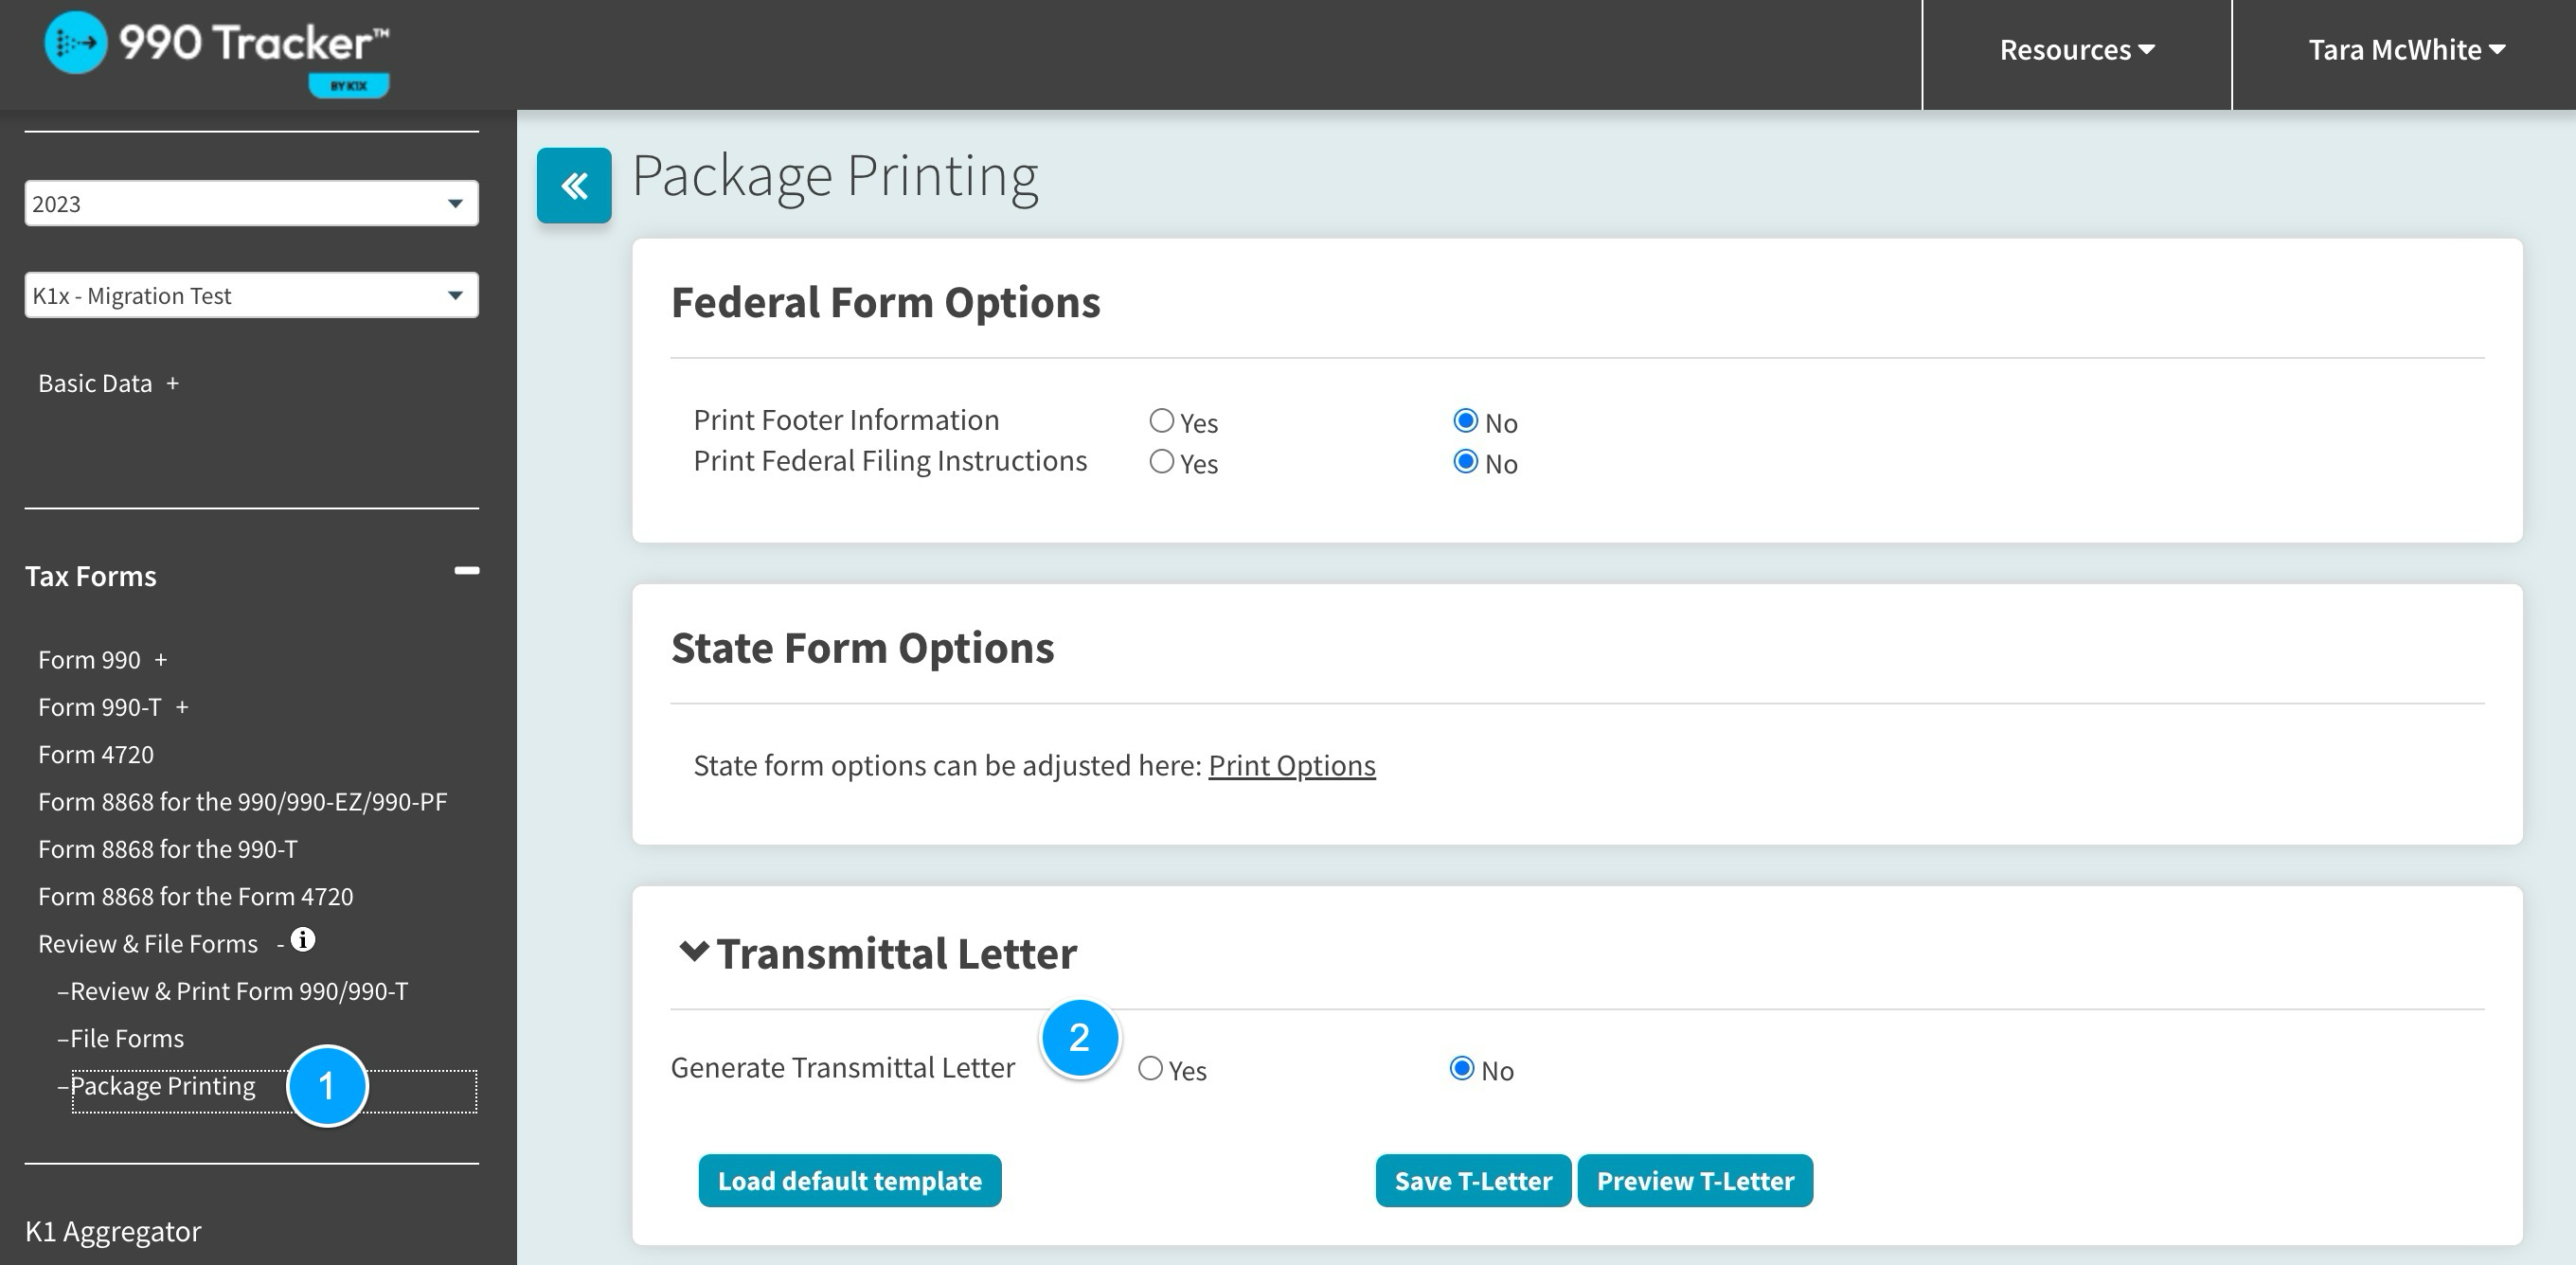
The new Transmittal Letter UI is located on the 'Package Printing' page.
- Tax Forms > Review & File Forms > Package Printing
Enable the T-Letter
- Scroll to the 'Transmittal Letter' panel
- Select 'Yes' to Generate Transmittal Letter
- This will enlarge the panel and engage all the fields.
- Select 'No' to disable the T-Letter, hide the fields, and condense the panel.
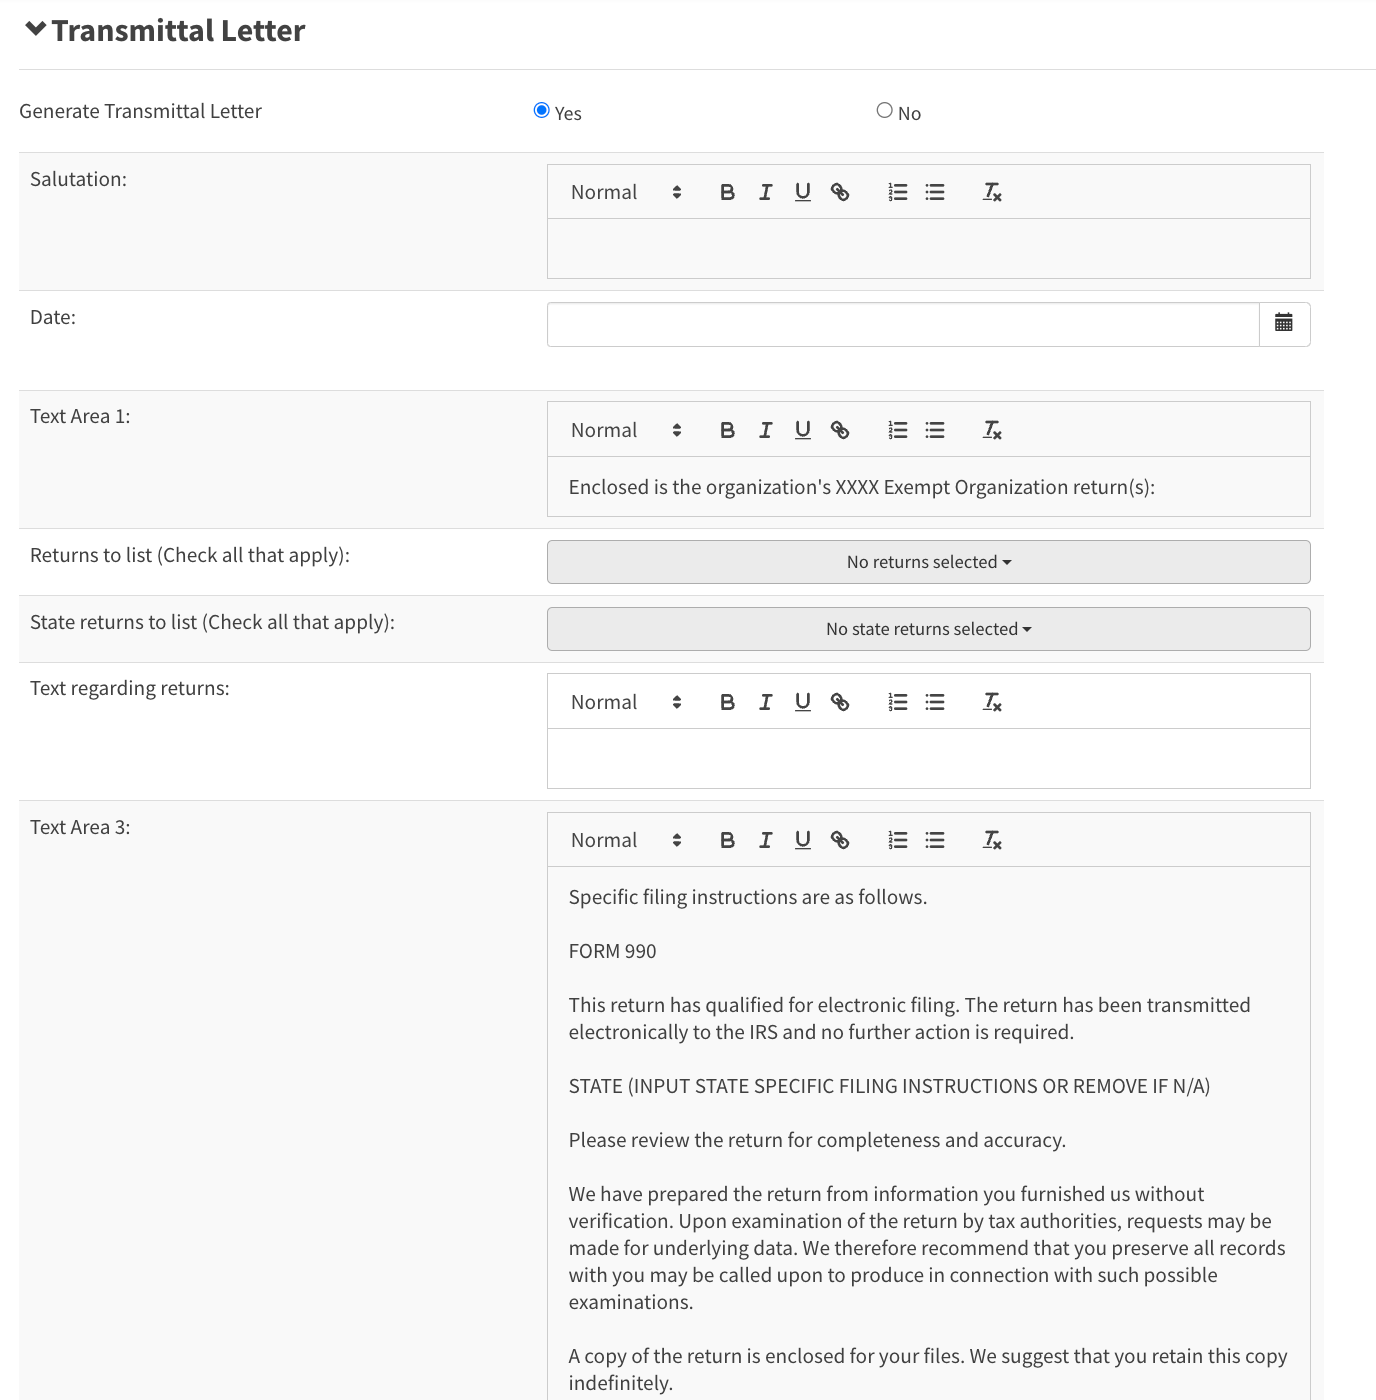
Configure Your Transmittal Letter
Once enabled, you can edit the following fields:
| Salutation | enter your greeting |
| Date | select the Transmittal Letter date |
| Text Area 1 | enter any message you want displayed before the list of returns included in the package |
| Federal returns to be included | select Federal Forms for this package |
| State returns to be included | select State Forms for this package |
| Text Area 2: Form XXX Verbiage | If Form 990, 990-EZ, 990-PF or 990-T, are selected, the default verbiage for the form is displayed (this can be edited) |
| Text Area 3 | enter any message you like displayed below Text Area 2 |
| Include certified mail language | check "Yes' to add this language |
| Contact Information | provide information for the recipient to contact you if needed |
| Text Area 4 | enter any message you'd like to include above the closing phrase |
| Closing Phrase | enter a sentence or expression to signal the conclusion of the message |
| T-Letter Signer | enter the name of the T-Letter signer |
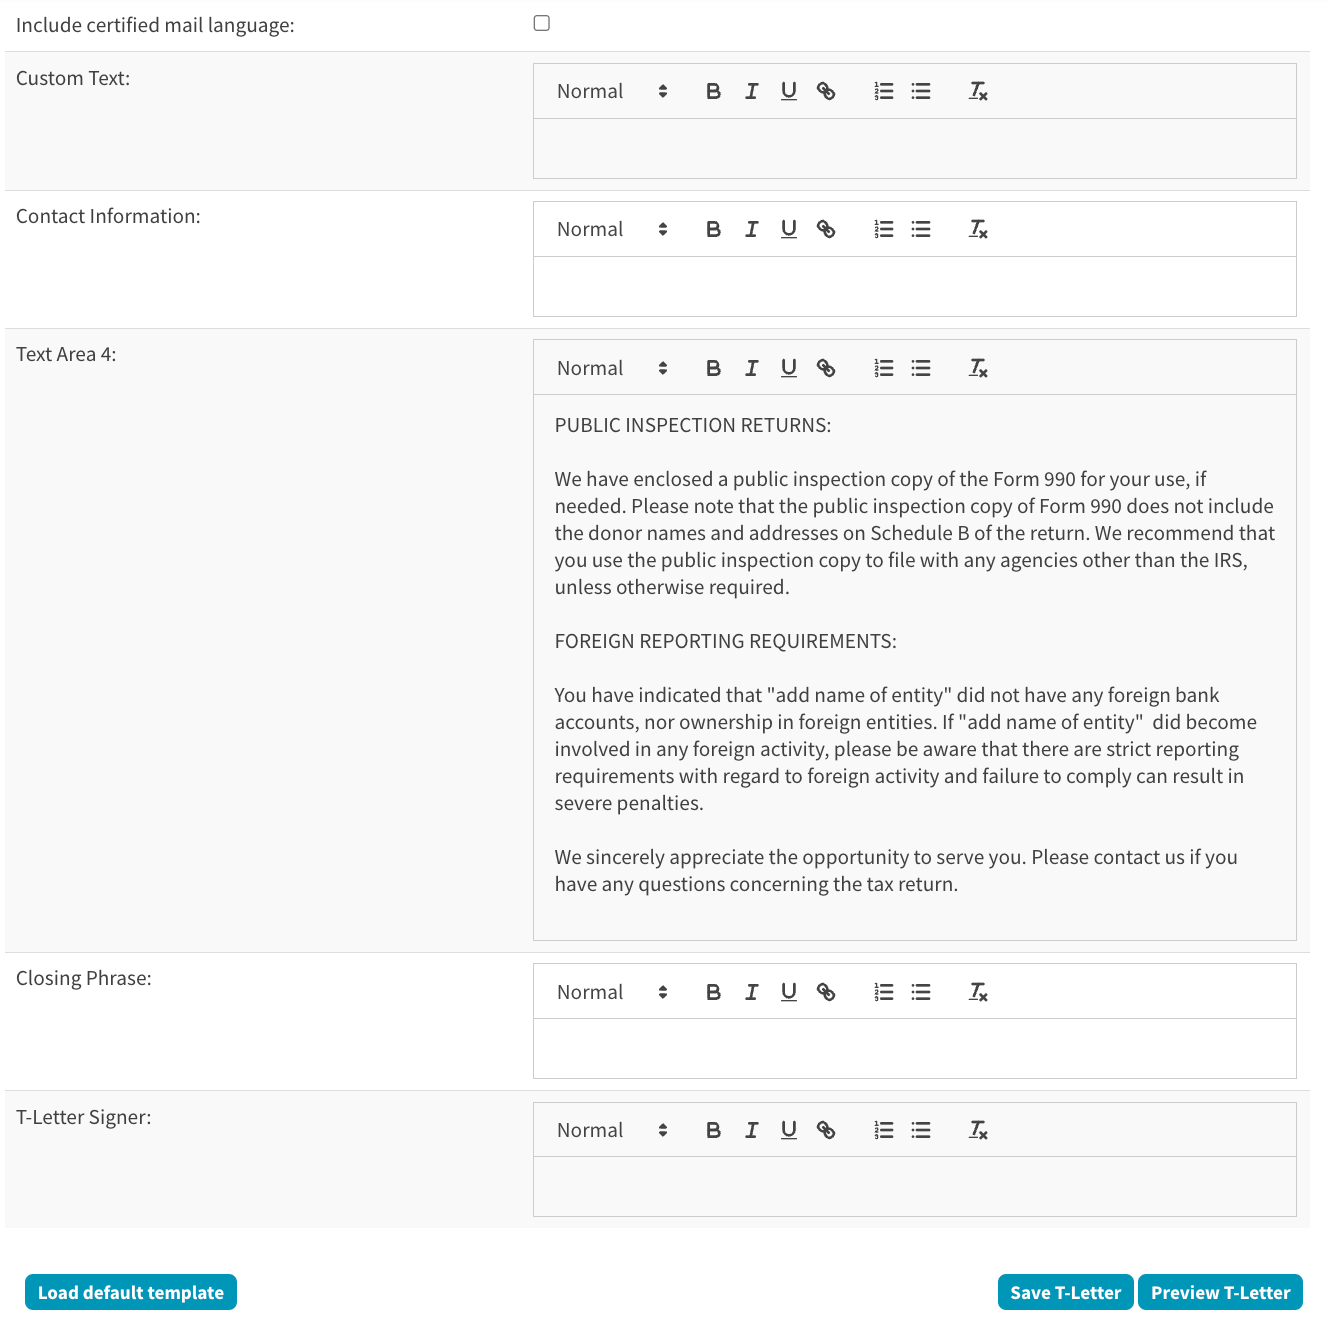
Options
- Load default template - selecting this will clear any changes you made here and default to any verbiage entered in the 'Transmittal Letter Management' page
- Save T-Letter - selecting this saves your changes
- Preview T-Letter - selecting this will download a PDF copy of the Transmittal Letter for review
You must select the 'Save T-Letter' button for the changes to take place.
Transmittal Letter Management
Admin-level users can access this page via the name dropdown.
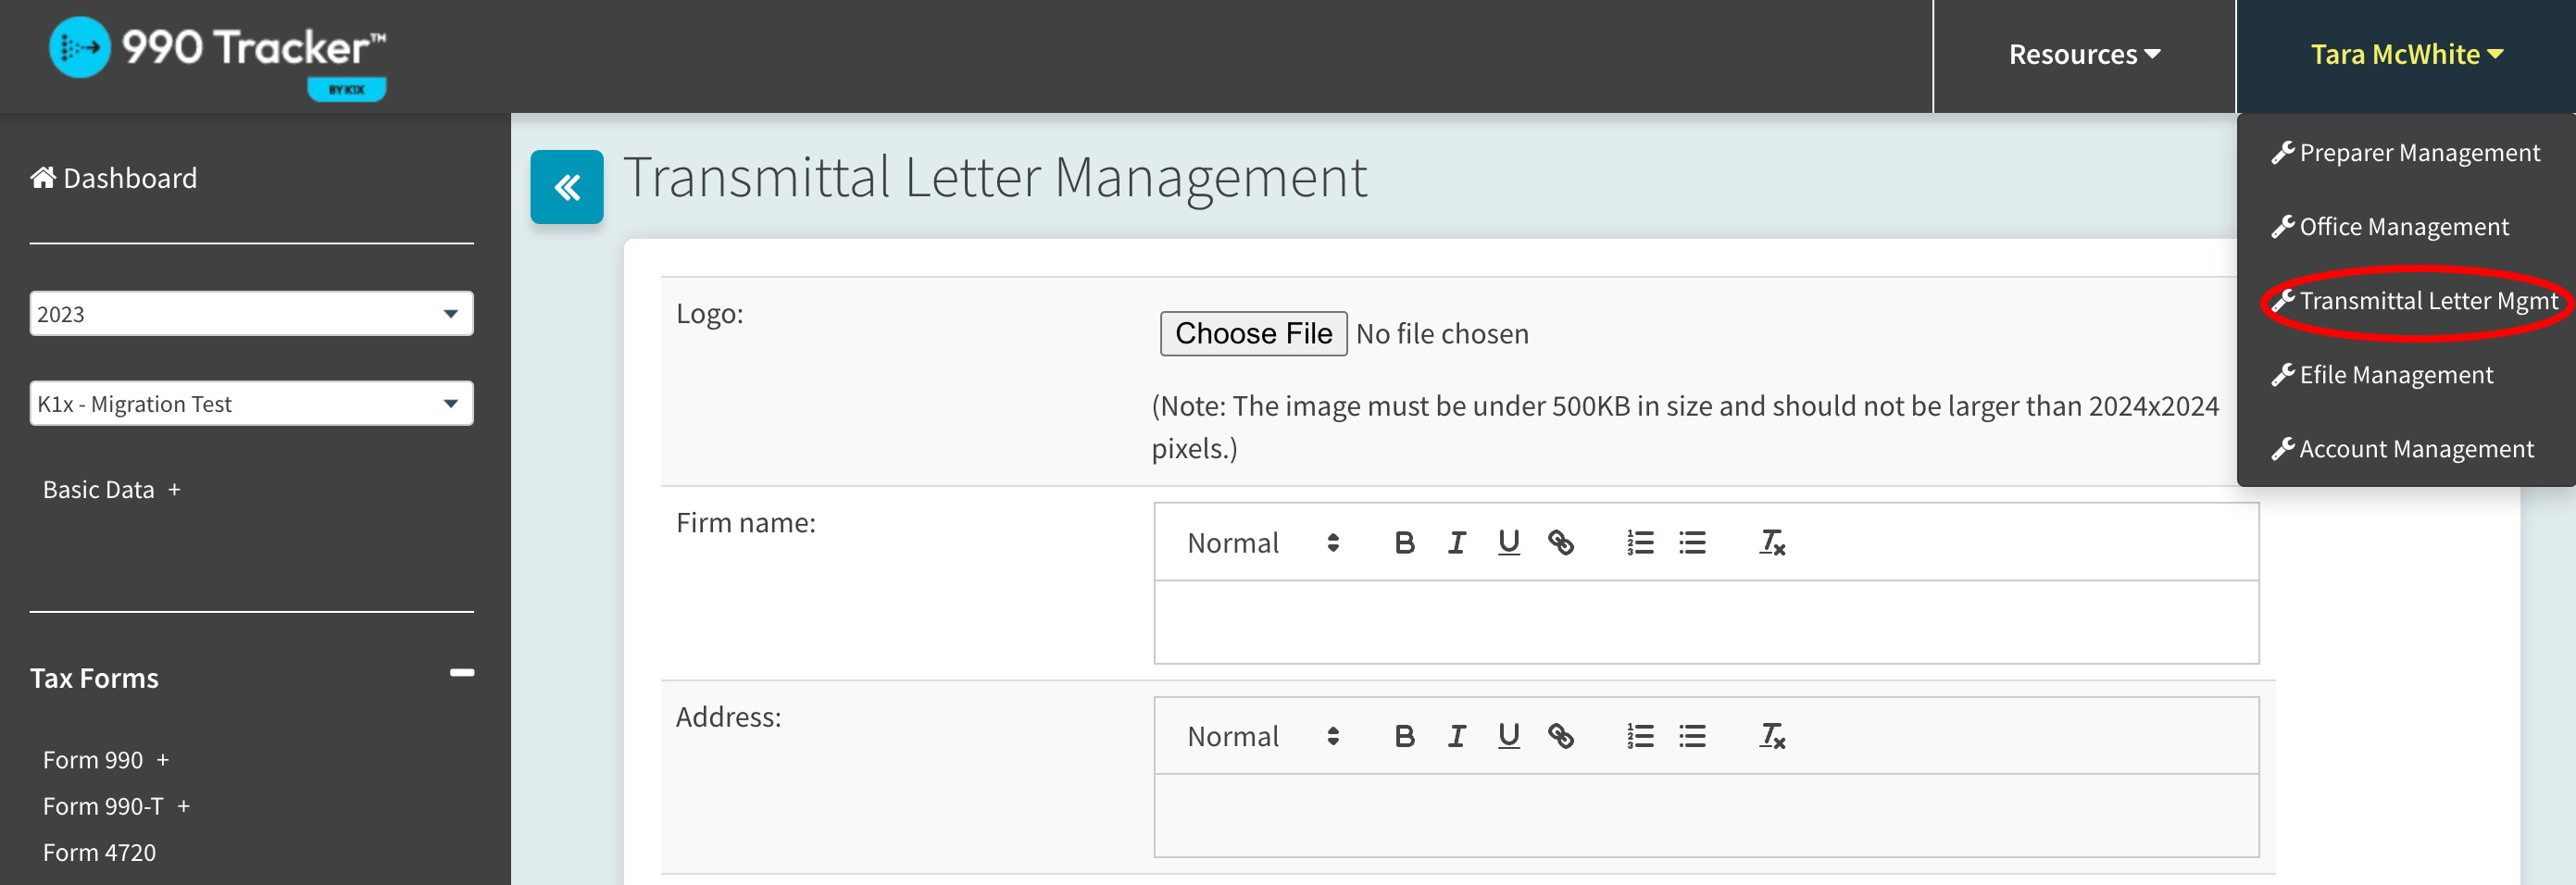
This page allows certain fields and features of the Transmittal Letter to be updated across multiple engagements.
In the Transmittal Letter Management page you can edit the following:
| Logo | upload an image to be displayed in the upper left-hand corner of your Transmittal Letter for all engagements |
| Firm Name | company name applied to all engagements |
| Address | company address applied to all engagements |
| Text Area 1 | for default template, text displayed before the list of returns included in the package |
| Text Area 2: Form XXX Verbiage | If Form 990, 990-EZ, 990-PF or 990-T, are selected, the default verbiage for the form is displayed (this can be edited) |
| Text Area 3 | for default template, text included below text area 2 |
| Text Area 4 | for default template, text included above the closing phrase |
You must select the 'Save Settings' button for the changes to take place.